
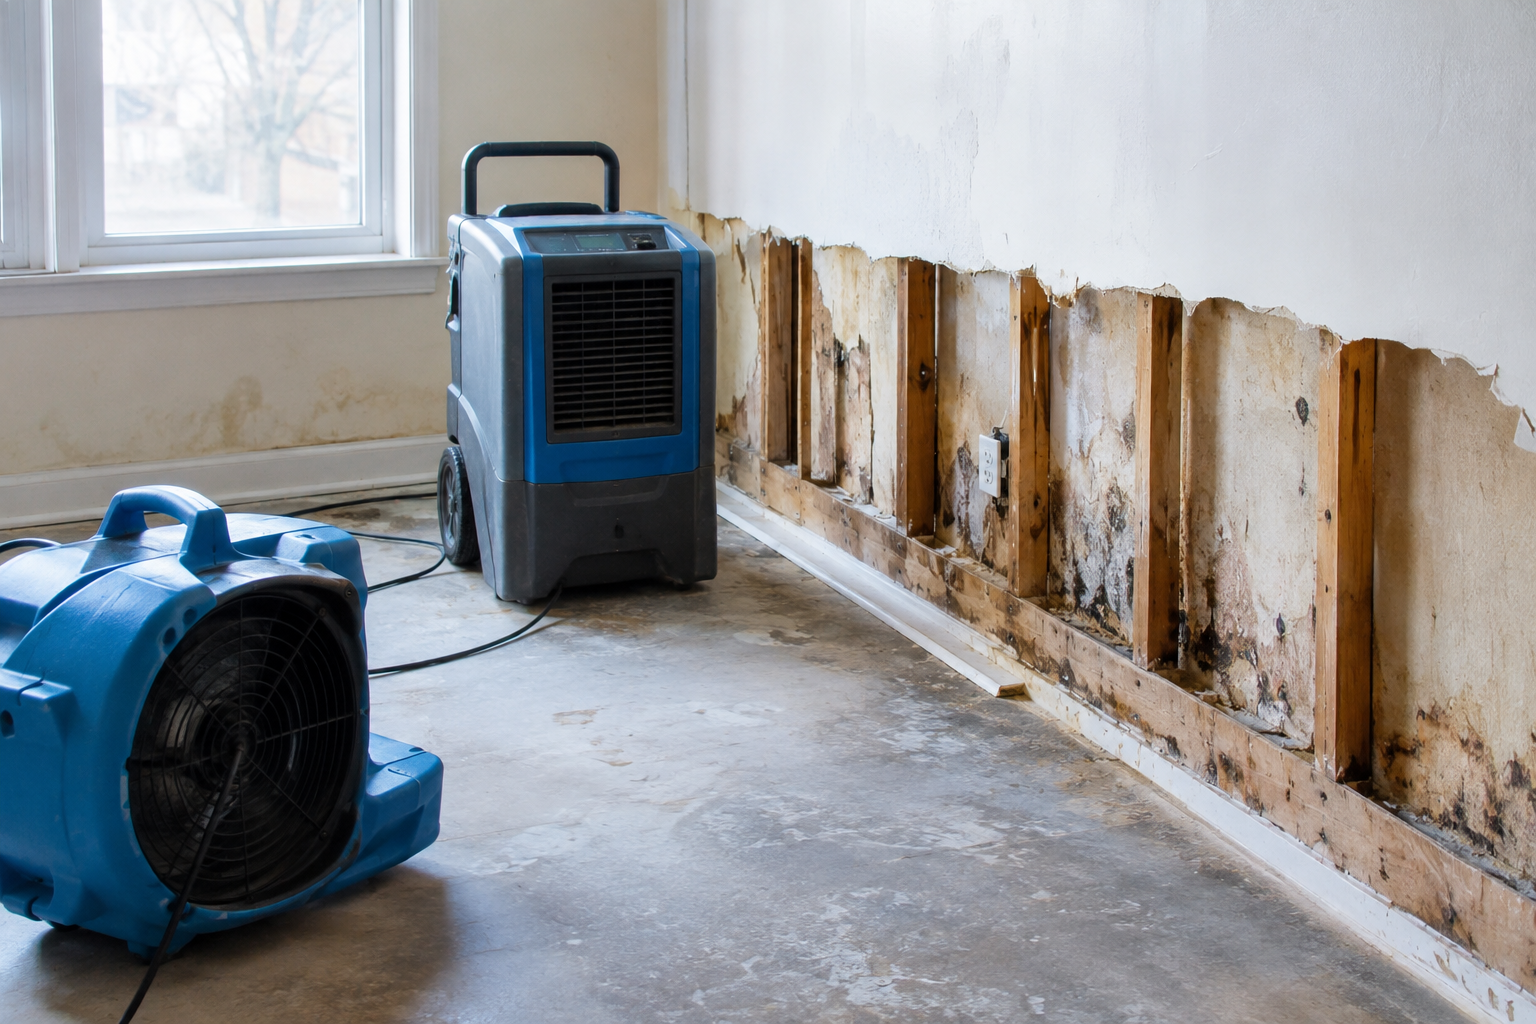
How to Dry Walls After Water Damage
If you need to know how to dry walls after water damage, the first steps are to stop the water source, remove excess moisture, improve airflow, control indoor humidity, and determine whether moisture remains inside the wall.
A wall can look dry on the surface while drywall, insulation, framing, or the wall cavity is still damp.
The faster you respond, the better. The U.S. Environmental Protection Agency recommends drying water-damaged areas and materials within 24–48 hours when possible to help prevent mold growth.
However, 24–48 hours is not a guarantee that every wall will be completely dry. Drying time depends on the amount of water, the materials affected, temperature, humidity, airflow, and whether moisture is trapped behind the wall.
For authoritative information about mold and moisture control, consult the EPA’s guidance on mold, moisture, and your home.
Quick Answer: How to Dry Walls After Water Damage
To dry wet walls after water damage:
- Stop the source of the water.
- Remove standing and surface water.
- Make sure electrical conditions are safe.
- Increase airflow around affected surfaces.
- Use a dehumidifier to reduce moisture in the air.
- Inspect the wall for hidden moisture.
- Check drywall, insulation, framing, and wall cavities.
- Use a moisture meter when appropriate.
- Remove materials that cannot be adequately cleaned or dried.
- Contact a water damage restoration professional when the damage is extensive, hidden, or contaminated.
Why Drying Water-Damaged Walls Matters
Water can move farther through a building than the visible stain suggests.
Moisture may travel into:
- Drywall
- Insulation
- Wood framing
- Baseboards
- Flooring
- Wall cavities
- Areas around plumbing
- Adjacent rooms
This means a small-looking water stain does not always represent the full extent of the damage.
If moisture remains trapped inside a wall, it can contribute to mold growth, material deterioration, unpleasant odors, and additional repair costs.
The EPA emphasizes moisture control as an important part of preventing indoor mold problems.
For that reason, drying water-damaged walls quickly and correctly should be treated as a priority rather than simply waiting for the surface to feel dry.
Step 1: Stop the Source of the Water
Before trying to dry a wall, stop additional water from entering the affected area.
The source could be:
- A leaking supply pipe
- A burst pipe
- A roof leak
- An overflowing appliance
- A plumbing backup
- A damaged water heater
- A bathtub or shower leak
- Water entering through a window
- Exterior water intrusion
- Floodwater
Drying a wall while the source is still active will not solve the underlying problem.
If the problem involves plumbing, repair the damaged pipe or fixture. If water entered from outside, identify and correct the exterior source before completing wall repairs.
Step 2: Remove Standing Water and Surface Moisture
If water is still present around the wall or on the floor, remove it before focusing on the drying process.
Depending on the situation, this may involve:
- Towels for small amounts of water
- Absorbent materials
- A wet/dry vacuum when conditions are safe
- Pumps for larger amounts of water
- Professional water extraction equipment
Never assume that visible water is the only moisture problem.
After removing surface water, dry accessible areas so fans and dehumidifiers can work more effectively.
Step 3: Make Electrical Safety a Priority
Water damage and electricity can create a serious hazard.
If water has reached electrical outlets, switches, wiring, appliances, or electrical panels, do not assume the area is safe simply because the water level has fallen.
If there is any doubt about electrical safety, have the area assessed by a qualified professional before using powered equipment.
This is particularly important after flooding.
CDC guidance for flooded homes recommends taking appropriate electrical precautions and avoiding electrical equipment in unsafe conditions.
Step 4: Improve Airflow Around the Wet Wall
Once the area is electrically safe, increase air circulation.
Fans can help move air across wet surfaces and encourage evaporation.
Whenever outdoor conditions allow, opening doors or windows can also improve ventilation.
However, airflow alone may not be enough when moisture has penetrated drywall or entered a wall cavity.
Position fans so air moves across affected surfaces rather than simply pointing one fan directly at a small section of the wall.
If the wall continues to feel damp despite improved airflow, investigate for hidden moisture.
Step 5: Use a Dehumidifier
A dehumidifier can help remove moisture from the air as water evaporates from wet building materials.
This can be particularly useful when:
- Outdoor humidity is high
- Windows cannot remain open
- Ventilation is limited
- A large amount of water entered the room
- Multiple materials are drying at the same time
The EPA recommends keeping indoor relative humidity below 60%, with an ideal range around 30%–50% when possible.
A hygrometer can help monitor relative humidity while the affected area is drying.
Step 6: Check Behind the Wall
One of the biggest challenges with water-damaged walls is hidden moisture.
Water can move behind drywall and remain inside:
- Insulation
- Wall cavities
- Wood framing
- Baseboards
- Flooring
- Areas around pipes
Signs of hidden moisture can include: - Soft drywall
- Swollen drywall
- Bubbling paint
- Peeling paint
- Discoloration
- Water staining
- Musty odors
- Warped baseboards
- Crumbling drywall
- Persistent dampness
- Visible mold
If moisture remains behind the wall, simply running a fan in front of the wall may not solve the problem.
Can You Dry Wet Drywall?
Sometimes.
Whether drywall can be saved depends on the amount of water, the type of water, the duration of exposure, and the condition of the drywall.
Drywall exposed to a limited amount of clean water may sometimes be dried successfully if it remains structurally sound and can be thoroughly dried.
However, drywall that is:
- Severely swollen
- Crumbling
- Structurally damaged
- Contaminated
- Unable to dry adequately
may need to be removed and replaced.
The situation is different when drywall has been exposed to sewage or contaminated floodwater.
CDC guidance recommends removing and discarding drywall and insulation contaminated with sewage or floodwater.
How Long Does It Take to Dry Walls After Water Damage?
There is no universal drying time.
A lightly damp surface may dry relatively quickly, while saturated drywall, insulation, or framing can take considerably longer.
Factors that influence drying time include:
- Amount of water
- Duration of exposure
- Type of drywall
- Type of insulation
- Wall construction
- Temperature
- Relative humidity
- Air circulation
- Dehumidification
- Size of the affected area
- Whether the wall cavity was affected
- Whether damaged materials were removed
The important goal is not simply reaching a specific number of hours.
Instead, the goal is to remove excess moisture and verify that the affected materials have dried adequately.
The EPA’s 24–48-hour guidance should therefore be understood as an important response window for reducing mold risk, not as a universal guarantee that every wall will be dry within 48 hours.
How to Know If a Wall Is Dry
Appearance alone is not enough.
A wall can look completely normal while moisture remains inside the material.
Look for:
- No worsening water stains
- No swelling
- No soft areas
- No persistent musty odor
- Stable drywall
- Stable paint
- No condensation
- No continuing water intrusion
For more reliable verification, a moisture meter can help identify areas that may still require attention.
Use a Moisture Meter When Appropriate
A moisture meter can help compare potentially affected areas with similar unaffected areas.
This can be useful because a wall may feel dry to your hand while still containing elevated moisture.
Different building materials require different measurement methods, so moisture meters should be interpreted appropriately.
For significant water damage, restoration professionals may use moisture mapping and repeated readings to track drying progress.
What About Mold After Water Damage?
Mold becomes a concern when moisture remains available.
The EPA explains that moisture control is a key part of controlling indoor mold.
That makes proper wall drying an important part of mold prevention.
Watch for:
- Musty odors
- Dark or discolored spots
- Visible mold
- Persistent dampness
- Condensation
- Repeated leaks
- Damp drywall
- Damp insulation
Drying affected materials quickly can reduce the opportunity for mold growth, but it does not guarantee that mold will never develop.
If visible mold is already present, do not simply paint over it.
The underlying moisture problem should be corrected first.
Should You Use Fans If Mold Is Already Visible?
Be cautious.
Fans can help dry wet areas, but aggressive air movement may not be appropriate when significant visible mold is present because disturbing contaminated materials can spread particles.
If mold growth is extensive, the water source is contaminated, or the affected area is difficult to isolate, professional assessment may be appropriate.
For smaller areas, follow appropriate mold-cleanup precautions and avoid unnecessarily disturbing contaminated materials.
What If the Water Came From a Flood or Sewage Backup?
This situation requires additional caution.
Floodwater and sewage-contaminated water can contain microorganisms and other contaminants that are not normally present in a clean-water plumbing leak.
CDC guidance recommends cleaning and drying homes quickly after flooding and advises removing drywall and insulation contaminated with sewage or floodwater.
Do not treat contaminated water damage exactly like a small clean-water plumbing leak.
If the source was sewage, floodwater, or another potentially contaminated source, professional cleanup may be appropriate.
A Simple Wall-Drying Process
For a straightforward water-damage situation, follow this sequence:
1. Identify the source
Stop the leak or water intrusion.
2. Remove excess water
Extract standing water and dry accessible surfaces.
3. Check electrical safety
Do not operate electrical equipment in unsafe conditions.
4. Increase airflow
Use fans when conditions are safe.
5. Control humidity
Use a suitable dehumidifier and monitor indoor humidity.
6. Inspect the wall
Look for swelling, staining, soft drywall, odors, and signs of hidden moisture.
7. Measure moisture
Use a moisture meter when appropriate.
8. Remove damaged materials when necessary
Materials that cannot be adequately cleaned or dried may require removal.
9. Recheck the affected area
Continue monitoring until the affected materials have dried adequately and there are no signs of continuing moisture.
Common Mistakes When Drying Water-Damaged Walls
Mistake 1: Waiting for the Wall to Dry Naturally
A damp wall can remain wet inside even when its surface looks better.
Mistake 2: Using Only One Fan
Air movement helps, but significant water damage may require more effective drying equipment.
Mistake 3: Ignoring Humidity
If the room is already humid, evaporated moisture may not leave the environment efficiently.
Mistake 4: Painting Too Soon
Painting over damp drywall can hide an unresolved moisture problem.
Mistake 5: Ignoring the Wall Cavity
Water can travel behind drywall and affect insulation or framing.
Mistake 6: Looking Only at Visible Damage
The visible stain may not represent the full area affected by moisture.
Mistake 7: Treating Floodwater Like Clean Water
Contaminated water requires additional precautions and may require removal of porous materials.
Mistake 8: Assuming 48 Hours Guarantees Complete Drying
The 24–48-hour recommendation is an important response window for reducing mold risk, not a universal drying-time guarantee.
When Should You Call a Water Damage Restoration Professional?
Professional help becomes more important when:
- A large area of the home is affected
- Water entered the wall cavity
- Insulation became saturated
- Drywall is extensively swollen
- Drywall is crumbling
- Water remained for an extended period
- The source was sewage
- The source was contaminated floodwater
- Visible mold is present
- The ceiling or floor is also damaged
- You cannot determine how far the moisture traveled
- The area continues to smell musty
- Moisture readings remain elevated
- You are unsure whether the structure is safe
A restoration professional can evaluate the affected area, identify hidden moisture, use commercial drying equipment, document drying progress, and determine which materials may be restored or require replacement.
How Much Does It Cost to Dry Walls After Water Damage?
There is no single price for drying walls after water damage.
The cost can depend on:
- Size of the affected area
- Amount of water
- Source of the water
- Materials affected
- Drying equipment required
- Duration of drying
- Demolition requirements
- Reconstruction requirements
A minor localized leak may require limited drying equipment and repairs.
A larger loss involving saturated drywall, insulation, flooring, or structural materials can become considerably more expensive.
For that reason, avoid treating one national price as a universal estimate. Restoration companies generally need to inspect the damage before determining the scope of work.
How to Prevent Future Wall Water Damage
Once the wall is dry, take steps to reduce the chance of another water problem.
Inspect Plumbing
Check supply lines, drains, shutoff valves, washing-machine connections, and water heaters for signs of leaks.
Maintain the Roof and Gutters
Keep gutters clear and address roof problems before water can enter walls or ceilings.
Watch for Condensation
Condensation around windows, pipes, exterior walls, or ceilings can indicate excessive humidity.
Control Indoor Humidity
Use ventilation, air conditioning, or dehumidification when necessary.
Check Vulnerable Areas
Pay particular attention to bathrooms, kitchens, laundry rooms, basements, and areas around plumbing.
Respond Quickly to Leaks
The faster water is removed, the easier it may be to limit secondary damage and moisture-related problems.
FAQ
How do you dry walls after water damage?
Stop the water source, remove excess water, improve airflow, control humidity with dehumidification, inspect for hidden moisture, and verify that affected materials have dried adequately.
How long does it take for walls to dry after water damage?
There is no universal drying time. Light surface moisture may disappear relatively quickly, while saturated drywall, insulation, or framing can take much longer.
Can I use a fan to dry a wet wall?
Yes, when electrical conditions are safe. Fans can increase air circulation and help moisture evaporate from wet surfaces.
Does a dehumidifier help dry walls?
Yes. A dehumidifier removes moisture from the air and can improve drying conditions when used with appropriate airflow.
Can wet drywall be saved?
Sometimes. If drywall remains structurally sound and can be thoroughly dried, it may be possible to save it. Severely swollen, crumbling, contaminated, or persistently wet drywall may need to be removed.
Can wet walls cause mold?
Yes. Persistent moisture can create conditions that allow mold to grow. Controlling moisture is an important part of mold prevention.
Should I paint a wall after water damage?
Wait until the water problem has been corrected and affected materials are adequately dry. Painting over damp material can conceal an unresolved moisture problem.
What should I do if water came from sewage?
Treat the situation as contaminated water damage. Avoid unnecessary contact and consider professional cleanup, especially when drywall, insulation, flooring, or other porous materials are affected.
Do I need a moisture meter?
Not every minor leak requires one, but a moisture meter can be useful when you need to determine whether a wall or other building material still contains elevated moisture.
When should I call a water damage restoration company?
Call a professional when the damage is extensive, moisture is hidden, the water source is contaminated, materials remain wet, or you cannot confidently determine whether the area has dried.
The Bottom Line
Knowing how to dry walls after water damage is about more than making the surface feel dry.
The most important steps are to stop the water source, remove excess water, improve airflow, control humidity, inspect for hidden moisture, and verify drying before repairs are completed.
The EPA recommends drying water-damaged areas and materials within 24–48 hours when possible to help prevent mold growth. CDC guidance similarly emphasizes rapid cleaning and drying after flooding or disasters.
If the damage is extensive, contaminated, hidden behind the wall, or difficult to dry, professional water damage restoration can help identify the full scope of the problem and reduce the risk of ongoing moisture damage.