
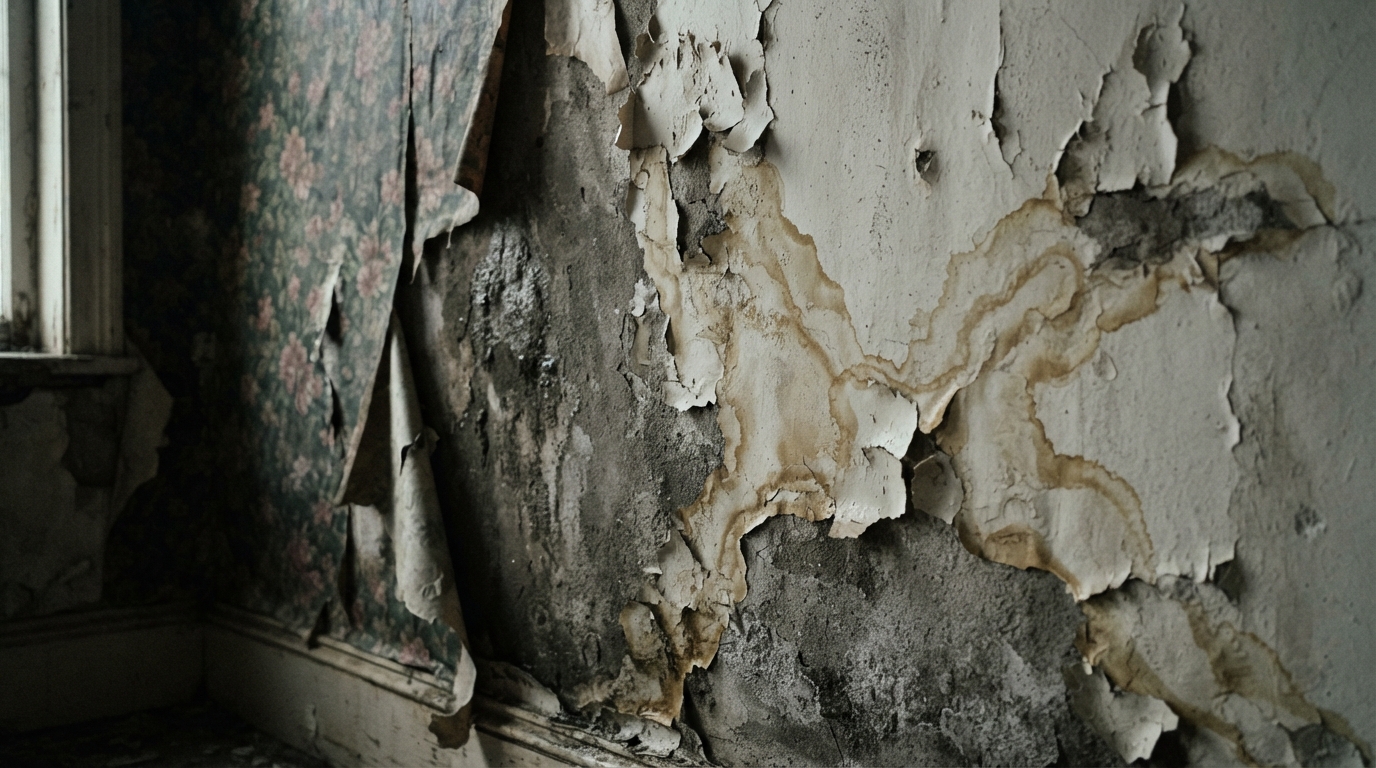
How long does it take for walls to dry after water damage? If your wall has been soaked by a burst pipe, leaking appliance, roof leak, overflowing bathtub, or flood, understanding the drying time is one of the first things you need to know.
The honest answer is: there isn’t one exact drying time.
Several factors determine how quickly a wall dries, including how much water entered the wall, what the wall is made of, how long it stayed wet, the temperature and humidity, the amount of airflow, and whether moisture is trapped inside the wall cavity.
However, a wall can feel dry on the surface while moisture remains deeper inside the drywall, insulation, framing, or wall cavity.
For homeowners, the goal isn’t simply to make the wall feel dry. Instead, you want to remove the moisture thoroughly and as quickly as reasonably possible before it causes additional damage or creates conditions that support mold growth.
The EPA’s guidance on mold, moisture, and your home recommends drying wet materials quickly, generally within 24–48 hours when possible, to help prevent mold growth. Keep in mind, though, that this is a response window, not a promise that every wall will be completely dry in 48 hours.
How Long Does It Take for Walls to Dry After Water Damage?
There is no universal number of hours or days that applies to every water-damaged wall.
A lightly damp wall from a small leak that was repaired quickly may dry relatively fast. By contrast, a wall that has absorbed a large amount of water, contains wet insulation, or has a saturated wall cavity can take much longer.
The key distinction is between surface drying and complete drying.
In fact, a wall can feel dry to your hand while moisture remains deeper inside. This matters particularly with drywall and framed walls because the visible surface doesn’t tell you everything happening behind it.
The EPA’s water-damage guidance notes that wallboard may sometimes be dried in place when there is no obvious swelling and the seams remain intact. When those conditions aren’t met, removal and replacement may be appropriate. In addition, the EPA recommends ventilating the wall cavity when possible.
The 24–48 hour rule: what it actually means
You may see the 24–48 hour timeframe mentioned frequently in water damage and mold prevention advice.
The EPA recommends drying wet, non-moldy materials within 48 hours when possible to help prevent mold growth. Similarly, the CDC’s mold cleanup guidance advises homeowners on safe cleanup following mold and water damage.
However, don’t interpret this as:
“If my wall isn’t dry after 48 hours, it automatically has mold.”
That’s not what the guidance says.
Mold growth does not always occur after 48 hours. Instead, the 24–48 hour timeframe is a practical guideline for responding quickly to moisture.
For this reason, the real objective is to remove the moisture source and dry the affected materials as quickly and thoroughly as reasonably possible.
Why There Isn’t One Exact Wall Drying Time
Several factors can dramatically change how quickly a wall dries.
1. How much water entered the wall
A small plumbing leak that wets one section of drywall is very different from several inches of floodwater entering a room.
More water generally means more material has to dry—and more places may need to be inspected.
In addition, water can move beyond the area that looks visibly damaged.
2. The type of wall material matters
Different materials handle water differently.
Drywall or gypsum board can absorb water. Wood framing can also retain moisture. Meanwhile, insulation inside the wall can complicate drying because the visible surface may not reveal how wet the cavity has become.
The EPA identifies wallboard, wood surfaces, and insulation among the materials that require different responses after water damage.
3. The wall cavity may be wet
This is one of the biggest reasons homeowners can underestimate a water problem.
For example, imagine a pipe leaking inside a wall.
You may see a small stain on the drywall. Behind that stain, however, water may have reached:
- insulation
- wood framing
- electrical components
- the back of the drywall
- the bottom of the wall cavity
- adjacent flooring
That’s why drying shouldn’t be based solely on whether the painted surface feels dry.
4. Humidity affects drying
A damp room makes it harder for moisture to leave wet building materials.
For that reason, dehumidification can be useful during water damage cleanup.
The EPA recommends keeping indoor relative humidity below 60%, with 30–50% being an ideal range when possible, as part of moisture and mold control.
5. Air movement matters
Moving air across wet surfaces can accelerate evaporation.
Fans can help, but they aren’t the entire solution.
If the room is already very humid, simply moving moist air around may not solve the underlying problem. Instead, dehumidification can help remove moisture from the air so additional water can evaporate from building materials.
6. The source of the water matters
A clean-water plumbing leak is not the same situation as sewage or contaminated floodwater.
The EPA specifically warns that its basic water-damage cleanup table is intended for clean-water damage. Therefore, if the water may contain sewage or other contaminants, additional precautions and professional expertise may be necessary.
That distinction matters before you start pointing fans at a wet wall.
How to Tell If a Wall Is Actually Dry
This is where many DIY drying attempts go wrong.
Most importantly, touch is not a reliable moisture test by itself.
Painted drywall can feel completely normal while moisture remains behind the surface.
Instead, look at the entire affected area.
Look for visible warning signs
Pay attention to:
- staining
- bubbling or peeling paint
- swollen drywall
- soft spots
- damaged seams
- warped trim
- musty odors
- discoloration
- recurring dampness
- moisture appearing again after the surface dries
These signs don’t automatically tell you how much moisture remains. They do, however, indicate that the wall deserves a closer inspection.
Consider moisture measurements
A moisture meter can provide more useful information than simply touching the wall.
The goal isn’t to chase one magic number that applies to every wall. Materials have different moisture characteristics, and readings need to be interpreted in context.
For example, a professional restoration assessment may compare affected areas with unaffected areas and use multiple measurements to determine whether drying is progressing.
How to Dry Walls After Water Damage
If you’re dealing with a relatively small, clean-water incident and the area is safe to work in, the general drying process looks like this.
Step 1: Stop the water source
Before worrying about drying, stop the source.
That could mean:
- shutting off a leaking supply line
- repairing a plumbing leak
- stopping an appliance leak
- addressing a roof leak
- dealing with water entering from outside
Ultimately, there is little point in drying a wall while water is still entering it.
Step 2: Remove standing water
If water has accumulated on the floor, remove it as quickly as possible using appropriate equipment.
The CDC recommends using wet-dry vacuums, pumps, or other appropriate equipment after flooding when electrical conditions are safe.
Step 3: Make sure electricity is safe
This step is easy to overlook—and potentially dangerous.
If water has reached electrical outlets, wiring, appliances, or electrical components, don’t assume the area is safe simply because the water level is low.
For safety, the CDC advises never turning electrical power on or off yourself or using electrical tools while standing in water.
When electrical systems have been affected, involve a qualified electrician as appropriate.
Step 4: Increase airflow
Once the area is safe and the water source has been addressed, airflow can help moisture evaporate.
Fans can be useful, and the CDC recommends using fans and dehumidifiers to remove excess moisture when electricity is safe.
However, after floodwater or potentially contaminated water, drying methods need to be chosen carefully. You don’t want to spread contamination or mold particles throughout the home.
Step 5: Reduce indoor humidity
A dehumidifier can remove moisture from the air and make it easier for wet materials to continue drying.
This is particularly important in rooms with limited ventilation or naturally high humidity.
In other words, keep monitoring the room rather than assuming that running a dehumidifier for a certain number of hours automatically means the wall is dry.
Step 6: Check the wall cavity
If water entered the wall, the cavity may require attention.
The EPA notes that wallboard can sometimes be dried in place when it hasn’t swollen and its seams remain intact. In addition, it recommends ventilating the wall cavity when possible.
If drywall is swollen, damaged, or unable to dry adequately, replacement may be necessary.
Step 7: Keep monitoring
Drying is a process, not a timer.
Continue checking the affected area and comparing moisture levels when appropriate.
The question shouldn’t be:
“Have the fans been running long enough?”
Instead, ask:
“Is the material actually dry?”
That’s a much more useful question.
Can Wet Drywall Be Dried, or Does It Need to Be Replaced?
Sometimes wet drywall can be dried in place.
The EPA indicates that wallboard may be dried in place when there is no obvious swelling and the seams remain intact.
However, damaged drywall isn’t always a candidate for simple drying.
Replacement may become necessary when the material is:
- swollen
- badly damaged
- structurally compromised
- unable to dry adequately
- contaminated
- visibly affected by mold
Floodwater presents another consideration because the water may contain contaminants that aren’t present in a simple plumbing leak.
In other words, “just dry it out” can be an oversimplification.
What Happens If Water-Damaged Walls Stay Wet Too Long?
The longer building materials remain damp, the more difficult the situation can become.
Moisture can contribute to:
- mold growth
- deterioration of porous materials
- damaged drywall
- damaged insulation
- staining
- persistent odors
- additional repair work
The EPA emphasizes that moisture control is the key to mold control and recommends drying damp or wet materials within 24–48 hours when possible.
Still, don’t treat 48 hours as a magical cutoff.
A wall doesn’t suddenly become “safe” at 47 hours and “moldy” at 49.
Instead, the actual condition of the materials, the amount of moisture, temperature, humidity, contamination, and how quickly the source was addressed all matter.
When Should You Call a Water Damage Restoration Professional?
Not every wet wall requires a restoration company.
Professional help becomes particularly useful when:
- a large area of the home is affected
- water has entered wall cavities
- insulation is wet
- drywall is swollen or damaged
- the source of the water is unclear
- water came from sewage or contaminated flooding
- mold is already visible
- the HVAC system may be contaminated
- you cannot determine whether the wall is dry
- drying equipment isn’t producing adequate results
- the damage involves multiple rooms
- structural materials may be affected
In addition, a professional can help determine whether materials can be dried in place or need to be removed.
That distinction can prevent two expensive mistakes:
Removing materials that could have been saved—or leaving materials in place that shouldn’t have been.
How Much Does It Cost to Dry Water-Damaged Walls?
There isn’t a single reliable price for drying walls after water damage.
The final cost can depend on:
- size of the affected area
- amount of water
- type of water
- wall construction
- drywall condition
- insulation
- accessibility
- drying equipment required
- duration of the drying process
- labor
- whether materials must be removed
- whether mold remediation is necessary
- local labor rates
- emergency or after-hours service
Because of that, a quote based only on the size of a visible stain can be misleading.
A small-looking water stain can conceal a much larger moisture problem.
For a homeowner comparing repair options, the more useful question isn’t simply “How much does drying cost?”
Instead, ask:
“What materials are wet, how extensive is the moisture, and what needs to be done to return the area to a properly dry condition?”
How to Prevent Future Water Damage
Once you’ve dealt with wet walls, prevention becomes much more attractive.
Fortunately, a few practical steps can reduce future problems.
Check plumbing regularly
Look beneath sinks, around toilets, behind washing machines, and near water heaters for signs of leaks.
Pay attention to small stains
A new ceiling or wall stain isn’t something to ignore just because it looks small.
In fact, it may be the first visible sign of a hidden leak.
Control indoor humidity
The EPA recommends keeping indoor relative humidity below 60%, ideally between 30% and 50% when possible.
Maintain gutters and drainage
Water should be directed away from the home’s foundation rather than allowed to accumulate against it.
Know where your main water shutoff is
When a major leak occurs, knowing how to stop the water can make a meaningful difference.
FAQ
How long does it take for drywall to dry after water damage?
There is no universal drying time. It depends on the amount of water, drywall condition, wall construction, humidity, airflow, temperature, and whether moisture is trapped behind the wall.
For that reason, the important goal is to begin drying quickly rather than waiting for the wall to dry naturally.
Can I dry wet walls myself?
For a small, clean-water incident, some homeowners may be able to handle basic drying if the area is safe and the damage is limited.
However, hidden moisture, contaminated water, extensive damage, swollen drywall, or uncertainty about electrical safety are good reasons to seek professional help.
Will a fan dry a water-damaged wall?
A fan can help increase airflow and evaporation, but it isn’t always enough by itself.
In addition, dehumidification, moisture removal, and access to the affected wall cavity may also be necessary.
How do I know if there is moisture behind my wall?
Visible staining, swelling, musty odors, recurring dampness, and other signs can indicate hidden moisture. However, they don’t provide a complete diagnosis.
Moisture measurement and professional inspection may be appropriate when hidden water is suspected.
Can water-damaged drywall be saved?
Sometimes.
The EPA notes that wallboard may be dried in place when there is no obvious swelling and seams remain intact. On the other hand, severely damaged, contaminated, or mold-affected drywall may need to be removed and replaced.
Does water damage always cause mold?
No.
Water damage does not automatically mean mold will develop. Nevertheless, moisture creates the conditions mold needs, which is why the EPA and CDC emphasize drying wet materials quickly.
Is drying a wall within 48 hours guaranteed to prevent mold?
No.
The 24–48 hour timeframe is a practical guideline for responding quickly to moisture. It is not, therefore, a guarantee that mold cannot develop, nor does being beyond 48 hours prove that mold is present.
The Bottom Line
So, how long does it take for walls to dry after water damage?
It depends.
A wall may dry relatively quickly after a small, promptly stopped leak, while a wall with saturated drywall, insulation, or a wet cavity can take substantially longer.
Ultimately, the most important steps are to:
- Stop the water source.
- Remove standing water.
- Make sure electrical conditions are safe.
- Increase appropriate airflow.
- Reduce indoor humidity.
- Check for moisture inside wall cavities.
- Monitor the affected materials rather than relying on time alone.
- Get professional help when the damage is extensive, contaminated, hidden, or difficult to assess.
In short, a wall that feels dry isn’t necessarily a wall that is dry.
That’s why proper moisture assessment matters—and why starting the drying process as soon as possible is one of the smartest things a homeowner can do after water damage.